Congratulation cadet! You’ve completed Ratchet & Clank for the PS4, the rebooted game based on the movie based on the original game. But that’s not enough for you! Oh no, you want to get 100% Trophy completion don’t you? After all, besides taking a trip down memory lane and giving us some fun new twists and turns, Insomniac made getting that 100% Platinum Trophy very reasonable… but maybe a little time consuming. Well FEAR NOT!
I have a ton of Tips & Tricks for helping you not only complete every trophy; but do so in a blazing fast manner. In fact, cadets with some foresight will be able to complete 98% of these trophies before getting even halfway through Challenge Mode! Don’t believe me? Well find out for yourself as I give you all the Tips & Tricks I found for Speed Running Challenge Mode and getting that coveted Platinum Trophy.
How To Earn Bolts, Raritanium, Holocards & EXP Fast – The Faster & Safer Route:
Whether you want to speed run this or not, if you’ve made it to Challenge Mode then your first order of business is to quickly up the amount of Bolts and Holocards in your possession so that you can ‘up your arsenal’ to their Omega variants. The Holocards should already be well on their way through normal playthrough and you should just need to complete some sets. Either way, with some Omega Weapons costing upwards of 300k – and the Omega RYNO costing 1 Million – you’re going to need some series bolts! So the below Step by Step strategy will not only show you the best place for early farming – and an alternative – but also factor in prepping for weapon upgrades (which we will detail in the next section). So here we go!
- Step 1 – Reach x20 Bolt Multiplier
Needless to say, this is the most important step of them all as a x20 multiplier will make even minimal bolt gains turn into almost 7,000 bolts per small enemy cluster. This is best achieved by going to Aridia and taking out the massive clusters of Sandsharks in the ‘Save Skid’ Mission – but DO NOT finish the mission – or Novalis. Either way, this is an essential part of this strategy and will also get you the “Cha-Ching!” Trophy.
- Step 2 – The Novalis & Aridia (Pre Save Skid Mission) Loop:
Now clearly, this method works best if you have not completed the Save Skid Mission on Aridia where you have to eliminate all the Sandsharks. Basically, run the loop of sandsharks going straight and thenn curving around the plateau – DO NOT go up there – and then stand on the little quicksand rock between central Sandshark Nest and the area with 3 Sandshark Nests. This is your key zone for killing off Sandsharks and then retreating to the rock to allow for the Nest to respawn them all. Again, remember to keep an eye on how many Sandsharks remain as well as not hitting the nests. If you ignore the plateau, you should be fine. With a x20 Multiplier, a simple run of this loop with ‘minimal’ letting the sandsharks respawn will net you about 100k bolts.
Now you could just Reset The Difficulty to reset the challenge, but that method could get tedious. I prefer to then fly to Novalis and run that outside loop – with Zurkon Jr and Goatinator – while still making sure to avoid loosing the multiplier . The outside area of Novalis offers a very simple circular area with one Birdbot (watch out) and a swarm of smaller Peckbots that are easy targets. Also, be sure to smash the red mushrooms as they will give you an additional several thousand bolts a pop. It’s a little less than the farming method of Pre-Save Skid Aridia; but it’ll still net you about 75k bolts. Though you’ll gain even more if you haven’t gone to the secret area by the back of the river – though that is a one-time thing, but more on that in Step 3.
*Important Note: Whilst doing all this, keep track of your Bolts, Raritanium & Holocards so you can take a break and purchase new upgrades as you go – at least those related to Bolt/Raritanium/Holocard Multipliers and the weapons your using.
- Step 3 – Save Box Stockpiles For Your x20 Multiplier :
Now to be fair, this might be a little difficult with the Box Breaker is acquired; but this isn’t really about the stacks of boxes normally spaced out through levels – although they don’t hurt. This is actually in regards to those hidden stashes of Boxes – ie: the ones accompanying secret Holocard locations, behind Trespasser doors or in hard to reach areas. The best example of this is in Kerwan where once you get to the train station there are TWO secret areas behind the stacks of crates that have a ton of breakable boxes. But how do you get there and maintain your x20 Multiplier? Simple since you land at the Rangers HQ and can take the teleporter pad on the train back to the station. So long enemies and hello walk in the park to grab a ton of crates.
Keep using these routes as well as others you might find – like the famous Rilgar endless enemies trick – and you’ll max out your collectibles in no time. Though you can actually accomplish everything you need here with my tricks since you’ll ideally want to collect all the Omega Weapons before you hit Rilgar. As for any additional Raritanium and Holocards you might need, you’ll get more than enough while performing the Weapon Upgrade Tricks I’ll cover in the next two sections.
How To Upgrade Omega Weapons Unbelievably Fast (Part 1) – Nebula G34, Gaspar & Batalia:
*Important Note: Be sure to use the above Bolt & Holocard Farming method on Aridia/Novalis to obtain each Omega Weapon AS SOON AS POSSIBLE!!!!!!!
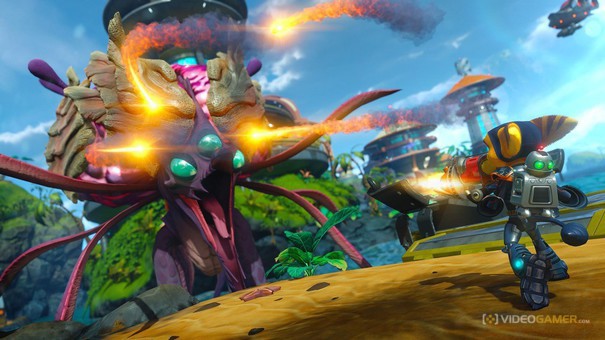
As you’ve probably noticed, upgrading Omega Weapons isn’t always an easy job. Heck, upgrading weapons in general isn’t easy as different enemies drop different amounts of EXP, everyone has their preferred weapons and remembering to switch sometimes is tough. If only there was a place with a high level enemy where you could keep fighting it and your ammo could be restocked in the blink of an eye. OH WAIT! THERE IS! It’s called a Boss Battle – specifically the Blargian Snagglebeast in the Blarg Research Station on Nebula G34.
Gun To Upgrade (In Order Of Ease/Importance) – Farming Strategy/Notes:
- Combuster/ Magmabuster – get in close and keep firing as every shot will connect with Snagglebeast’s hulking mass rewarding max EXP gain
- Fusion Grenade/ Fusion Bomb – get up close, toss rapid fire and reap rewards
- Warmonger/ Peacemaker – fire, wait for secondary explosion, fire again. MAKE SURE the secondary explosions have gone off before you fire 2nd rocket or else EXP won’t count for 2nd
- Predator Launcher/ Raptor Launcher – standard strategy of fire all; but works best during Phase 1.
- Glove Of Doom/ Apocalypse Glove – like above, works best during Phase 1. Max EXP gain when all bots hit Snagglebeast (rather than distracted by other enemies)
- Plasma Striker/ Plasma Slayer – because why carefully snipe your shots when you can blindly fire into a hulk Snagglebeast. Takes a little longer but still most rewarding method.
- Buzz Blades/ Doom Blades – fire like crazy but pay CLOSE attention to HP, remember they ricochet
- Pixelizer/ Pixelizer HD – fire like crazy, seriously go nuts. It doesn’t do much damage but still don’t be stupid.
Again, once the Snagglebeast nears low health, off yourself. And for some weapons – like Apocalypse Glove – you’ll notice that Phase 1 when its JUST Snagglebeast is much more rewarding, so either change it up or off yourself early. Just remember to bear in mind how damaging each weapon is, and you’ll be fine. And in case you’re wondering about any risks, I did notice the game start to lag ever so slightly after maybe my 20th repeat. Whether this was a glitch or the game augmenting difficulty cause it thought I sucked is unknown. So basically, use this strategy but don’t OVER use it. Get your desired weapon EXP and get out. There’s other bosses later, so just get the key biggies out of the way. You’ve been through the game once before so you should remember which bosses were more difficult than others.
How To Upgrade Omega Weapons Unbelievably Fast (Part 2) – Gaspar & Batalia:
Now of course some weapons won’t upgrade as easily as the ones above due to low damage output and or alternative damage methods. So how do you handle these? Well these guns actually fall into one several farming Methods – respawning swarms, sub-bosses, and general story progression:
The first method is not that far off from the original Bolt, EXP, Raritanium, Holocard Farming Loop that takes place on/between Aridia and Novalis. Post ‘Save Skid’ story mission, Novalis still has the greatest number of returning enemies and circular path. So just run the path, reset difficulty and go again. But if you are still pre ‘Save Skid’ story mission, nothing beats the continuously spawning Sandsharks, Just make sure not to kill the nests and you’re golden. The weapons best served by this strategy are:
Gun To Upgrade (In Order Of Ease/Importance) – Farming Strategy/Notes:
- Pyrocitor/ Lavacitor – nice, controlled burn baby burn!
- Groovitron/ Groovibomb – the last lap of the sandshark raid (with 3 nests) is IDEAL for throwing one of these badboys down.
- Mr Zurkon/ Zurkon Jr – use Aridia/Novalis arc for early upgrade levels, but post Level 8 things get harder
- Proton Drum/ Protoclast – (again) use Aridia/Novalis arc for early upgrade levels, but post Level 8 things get harder
The next batch is sub-bosses, which honestly offer the same strategy as regular bosses; but the difference here is that alternative methods of damage are now doable. In other words, the Telepathopus of Gaspar and Rocket Tank on Batalia (especially the one you face after sliding down the ice) are perfect for the Sheepinator/ Goatinator. For the Telepathopus it’s a little harder sometimes due to distance and movement; but a Groovitron/bomb can help that. You’ll find that each destroyed offers you about 15-25% EXP Stage Growth.
Of course, you can always level up any weapons you haven’t already through Story Progression. With the Snagglebeast and Aridia/Noavlis methods used, you’ll have only several weapons un-maxed – but pretty damn close. So for RYNO Xtreme and what’s left of the Protoclast, Groovibomb and Zurkon Jr, feel free to go trigger happy in the story – and reuse some of those reset methods I’ve taught you.
*Note: The Bouncer/Heavy Bouncer doesn’t count towards any trophies due to it being a Pre-Order Bonus; but I’d imagine it’s best upgrade path would be a good mix of Snagglebeast and Aridia’s 3-Nest Area.
Hoverboard Trophies Tips/Tricks – Help Specifically For Rilgar & Kalebo:
Not all Hoverboard races are created equal. From a ‘Timer’ perspective, you might think “Faster than a Speeding Amoeboid” (1:35) is more difficult than “Kalebo Thunder” (2:05). Then again, from a story progression perspective, you might think Kalebo is harder due to it being a far later level than Rilgar. The truth is that each race favors a completely different mechanic – Rilgar (Tricks) and Kalebo (Shortcuts) – but one will absolutely push you to the limits of sanity if you don’t know where to shave off seconds.
For me, “Kalebo Thunder” is the easier of the races as you just have to time the two shortcuts well, which is achieved by going through three sequential gates. The only problem you might encounter with this is the second gate as it’s activated from a platforjm ramp up to the side and ends with a jump that you have to hit JUST RIGHT or else risk slamming into the wall above (if overshot) or water below. All in all though, after a few practice runs to get the feel, you’ll ace this in the 2:05 Time Limit.
As for “Faster Than A Speeding Amoeboid”, you’ll need to not only make your own ‘mini shortcuts’ every chance you get, but you’ll also need to master the art of ‘Tricks”. Now I say mini-shortcuts because if you try stray TOO far from the course, you’ll wipe out. Again, through practice you’ll learn what spots are worth it and which are not. Though the real make-or-break factor of this race is learning how to PROPERLY do tricks. There’s not really a primer so it took me a while to figure it out, so hopefully I can save you some time with this one tip.
Tip: To do a trick you simply need to move the joystick – NOT Hold It
When you’re constantly holding the joystick to perform a trick, you have way too many opportunities to stumble or wipe out completely. It basically comes down to random timing because the rotation of the joystick doesn’t IMMEDIATELY effect your motion but rather actives a set number of turns. In other words, If you flick the joystick to the left, you’ll do exactly 1 horizontal twist to the left. Hit it twice and you’ll do two. If you hold it, you’ll keep spinning and can only PRAY that the ‘end’ of one of those instances coincides with your landing. So get a feel for this and go for the “less is more” method. Most jumps only allow 2 turns at most. Sure you can be a hero and go for 4 sometimes, but if you wipe out all those sick moves were not only wasted, but just made you lose precious time.
And with only 1:35 on the clock, you can only safely wipe out AT MOST 3 times. So play it safe and remember to keep filling up your boost meter and hit the boost pads you can. When you’re not boosting from Arrows, you’ll want to be boosting from stored Trick energy. So again: get a feel for it; learn how to do tricks safely; and show those Amoeboids who’s boss!
Story Specific Trophies – You Only Get 1 Shot… For Now
As I said at the start of this article, most of these trophies are easily achievable, but you still have to be careful since many are only doable during certain story missions and are unworkable after. So here’s the trophies you need to keep a look out for as you go through the story.
- That Sinking Feeling – “knocking a constructobot into the quicksand on Aridia” isn’t exactly difficult; but there’s very few constructobots around after you complete the level so get this on your first pass with your wrench.
- Not My Job – On Rilgar, wherever you see Amoeboids and Extermibots, just sit back and in the words of Godzilla (2013) “let them fight”, you’ll eventually hit the 35 killed mark.
- Clank Crusher – while on the Clank portion of Quartu, you’ll notice a Gadgebot used to lift an electronic press which brings you into a room with more presses and gadgebots. So for this one, get a 2nd gadgebot and return to that previous room. Switch gadgetbot #2 with #1. Then place #1 under the press, remove #2 and BOOM! Gadgebot #1 is crushed and respawns right next to you. Pick up the respawned Gadgebot #1, place under press and repeat until achievement pops up
- Character Assassination – when you get to Drek’s Office on the Deplanetizer, destroy all the globes in his office. There’s big planetary models lining both walls, you can’t miss them.
- Death By Disco – This might not seem story specific, but you do need to keep track of who you have and haven’t made dance. And some enemies only appear on the first trip through. So whenever encountering a new type of enemy/boss, make them dance. Just remember that individual forms count individually. So here’s a few you MIGHT have missed.
- The Pool Sharks need to dance while both IN water and flopping around.
- Amoeboids must dance in Small, Medium and Large forms.
- Those glowing night slubs on Veldin only show up in the opening Get Clank mission – they count too!
- Those pop-up tentacles on the Train between Aleero City and Ranger HQ also count.
So there you have it folks, some Tips & Tricks to help you speed through Ratchet & Clank (2016). The remaining trophies you’ll need to complete are pretty self-explanatory and can be solved with the simplest of Youtube Searches. So enjoy getting your 100% Platinum Trophy and let’s see if these Rebooted games will continue. I enjoyed how the original Ratchet & Clank story was redone to incorporate the series’ most notable bad guy but will this continue? I guess we’ll have to wait and see.


